
With food prices on the rise, being able to produce your own food and not rely on the grocery store is beneficial. Now is a great time to try growing a few things in your own garden or raised bed and potatoes are so easy! Whether you have a small garden or a lot of space to work with, everyone can grow potatoes in a potato box.
We have plenty of square feet but the chickens need all the room! So, we grow our potatoes vertically to save on space. Potato boxes allow you to grow potatoes with minimal space and still produce high yields.
Mike built me a few potato boxes last year, so he’s going to explain that process below if you’d like to build some for your garden!

Save Square Feet, Grow Vertically in a Potato Box!
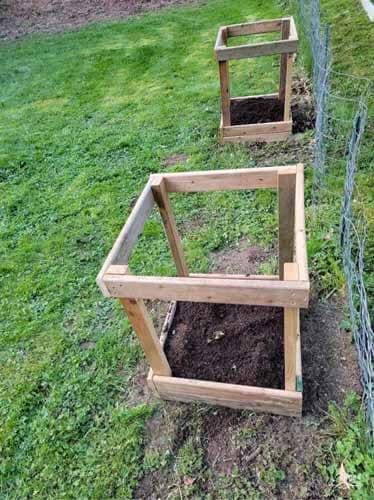
For a few years we’ve talked about building new potato boxes. Last year I decided to use up some wood from our woodpile and build Amy some new potato boxes. It’s a great alternative to planting in a traditional garden bed. I used supplies I had on hand around the house, but you can find a full supply list at the end of this post.
This is a super easy project. If you are project challenged don’t be afraid to give this one a try for a beautiful addition to your home garden.
I’m using cedar because that is what I have on hand. I also prefer cedar because it lasts longer. Amy likes it because bugs don’t like cedar. Let’s face it, anything that deters bugs is helpful.
Usually, we plant potatoes around St. Patrick’s Day. Ideally you want to plant your potatoes 2-4 weeks before the last frost date.
If you’re a visual person and would rather watch a video, feel free to head on over to our YouTube channel and watch how I built the potato boxes.
Tips for Building a Potato Box
Did you know Home Depot can cut boards to your specified lengths? You have to buy your boards there, they have to be staffed enough, and you may have to wait a bit. So, if you need them to cut your boards for you, I recommend shopping during a slower time of the day/week.
I am using a drill and screws because I have a drill available to me. But, if you do not have a drill, this project can be completed with a hammer and nails. Adjust the supply list accordingly from screws to nails when using a hammer. Be sure to measure so you purchase nails long enough to go through the board and securely attach it to the post. If you are in need of a drill I have my favorite drill listed in our Amazon Storefront.
Growing Potatoes

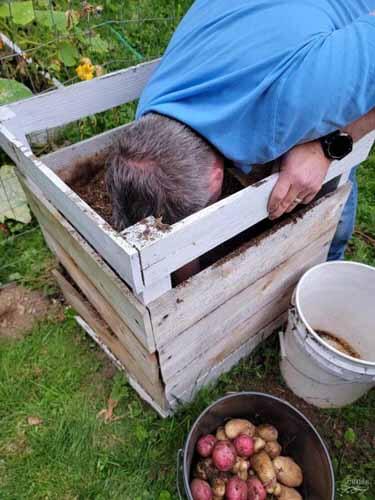
Amy and I usually head over to the local greenhouse and pick up a couple varieties of potato starts. I usually add in a couple of organic seed potatoes that have started to grow from our stash of potatoes at home as well. I recommend growing the potatoes you like to eat. When growing different types of potatoes, you might consider growing them separately; that way you know which box has what type of potato in it. Keep it simple and don’t overthink it.
When it comes to growing conditions, potatoes grow best in sandy, well-drained soil. You can run a soil test to see if you have good soil or need to add amendments. They also grow best in full sun. The amount of water will vary depending on your location and the timing of when you plant.
The number of potatoes you can plant in each potato box will be determined by the potato variety and size of the plant. You do not want to inhibit plant growth by having too many seed pieces in one area. It’s best to follow the planting instructions on the package of potato starts for each variety you are planting.
Amy has a YouTube video about how to store potatoes, you can watch that below.
Have Fun!
Gardening should be exciting and enjoyable. I hope you find my raised bed potato box video and instructions helpful. Once you grow your own potatoes, you should try making Amy’s Zuppa Toscana soup. It’s one of my favorites, and I’m sure you’ll love it just as much.


Potato Box Supply List
Equipment
- Tape Measure
- Pencil
- Saw or Circular Saw (or Lowe's/Home Depot can cut the wood for you.)
- Drill & Screws (or Hammer & Nails)
Materials
Shopping List for 2 Potato Boxes
- 3 Cedar Posts, 2" x 4" x 8'
- 14 Cedar Fence boards, ⅝" x 5½" x 6'
- 3 Cedar Fence boards, ⅝" x 3½" x 6'
- 160 Wood Screws, 1⅝" (1 or 2 lbs.)
Instructions
CUTTING INSTRUCTIONS:
Cut 2" x 4" x 8' Cedar Posts:
- Cut at 32 inches. This will give you three 32" pieces per 8' board.(A total of 8 pieces are needed, 4 for each box. There will be one extra piece, 32" long.)
Cut ⅝" x 5½" x 6' Cedar Fence Boards:
- Cut at 24". This will give you three 24"pieces per 6' board.(A total of 40 boards are needed, 20 for each box. There will be two, 24" extra pieces left.)
Cut ⅝" x 3½" x 6' Cedar Fence Boards:
- Cut at 24". This will give you three 24" pieces per 6' board.(A total of 8 boards are needed, 4 for each box. There will be one 24" extra piece left over.)
ASSEMBLY INSTRUCTIONS:
- For assembly instructions, please watch the YouTube video posted below.
Video
Notes
- The ⅝" x 3-½" x 6' cedar fence board is needed because 6 for the 5-½" fence boards do not fit within 32 inches. 5.5 x 5 = 33, technically (5.5 x 5) + 3.5 = 31. But there is variation in the wood, there can be small gaps when you add the boards at each layer.
- I use 3 screws at each connection for the top row and bottom row of boards. I use 1 screw at each connection. This adds up to 20 screws per side of a box.
This post may contain affiliate links. This means if you purchase through my links, I receive a small commission at no cost to you. For more information, please read my Disclaimer


Leave a Comment