
Summertime means fresh fruit and vegetables like green beans. They may be from your garden, a neighbor's garden, or from the Farmers Market; but, an abundance of the best tasting produce is at your fingertips. Today, we’re talking all about green beans. I’ll be teaching you how to can green beans over the next few weeks to get you through to the next harvest season.
Green beans are special to me. I have fond memories of snapping beans on the porch with my grandmother and Aunts. When I look at them I think of my family with fondness. This is something I look forward to doing with grandchildren as I hope to build these memories with them.
Cleaning Green Beans

Whether you have picked your green beans from your own garden, or purchased them from the Farmers Market, let’s get them cleaned and ready to eat. Green beans are featured in my book, the Zero Waste Produce Guide, which you can find in The Cross Legacy Shop.
To clean your green beans, wash them for one minute in approx. 10 cups of water and ¼ cup of vinegar. Set a timer. You can watch a quick tutorial video below. Lay them out in a single layer to air dry. Line a glass container with a paper towel. Once they are dry, place the beans in the glass container, put the lid on, and place the container in the fridge until you are ready to eat them.
I love my summer garden. Typically, I grow enough for us to eat a variety of fresh food, but not enough to preserve through winter months. I usually get my canning produce from the local Farmers Markets. Recently I grabbed a bushel of green beans at a local market for canning. I plan the amount I want to can from one harvest season to the next.
Green Beans Are a Great First Canning Project

Green beans are a great first item to learn to pressure can with. They can be snapped and prepared for canning without having to worry about them browning in between canning loads. There’s also no rush to get them into the jars. You can prepare the beans the night before and can them the next day.
When you can other items, like fruit, there are more steps involved. For instance, peaches need to be peeled and pitted. The fastest way to peel them is to drop them in boiling water to loosen the skin. Then they need to be pitted. They will brown quickly, which is why they need to be processed immediately. The process of canning green beans compared to peaches can be done at a slower, easier pace. If you want more home canning recipes, be sure to check out this blog.
Supply List
Here is a list of supplies you will for this project:
-
- Canner
- Canning Jars, Lids and Rings
- Jar lifter
- Pot Holders <li style="font-weight: 400;" aria-level="1">
- ="">="">="">="">="">="yoast-text-mark">="list-style-type: none;">
- *
- s="yoast-text-mark">s="yoast-text-mark">lass="yoast-text-mark" style="font-weight: 400;">ia-level="1">Measuring Spoons <li
class="yoa
-
- st-text-mark">"font-w
eight: 400;
- " aria-level="1">Boiling Water
- tyle="font-weight: 400;" aria-leve="">l="1">Green Beans
<h2>How to Can Green Beans
[wprm-re
cipe id="7046"]
A Few Final Canning Notes
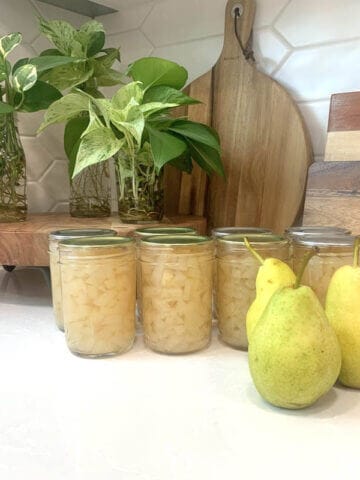
A bushel of green beans yielded me 28-pint jars. I did pint jars because it is just Mike and I eating and I don’t like a lot of leftovers in the fridge.
The pressure canner I prefer is the All American 921. I like this canner because it has two gauges and locking lugs. The locking lugs make me feel safer when canning. I did save up to buy this canner, but I also know this is an item I can pass down, it’s a legacy item.

I also use the Ball Complete Book of Home Preserving that can be found in my Amazon Store.
Now that this project is completed, I know that we will have canned green beans until the next harvest season. I like knowing how my food was preserved and exactly what is in my food.
Have you canned green beans before? Now that you know how to can green beans, are you going to give it a try? I am interested in hearing about your canning experience.
DISCLOSURE: This post may contain affiliate links. Which means if you make a purchase through my links, I receive a small commission at no cost to you. For more information, please read my Disclaimer .


Leave a Comment